New Kitchen Ceiling in Epsom: What a Full Ceiling Replacement Actually Involves
If your kitchen ceiling is cracked, sagging, or just completely had its day, a full replacement is more straightforward than most people expect — and it's exactly the kind of job I do regularly across Epsom and the surrounding areas.
This post walks through a recent kitchen ceiling job I completed in Epsom, from the initial strip-out right through to a smooth, paint-ready finish. If you're weighing up whether your ceiling needs patching or a full re-board and skim, hopefully this gives you a clear picture of what's involved.
Why Some Ceilings Can't Just Be Patched

There's a temptation to patch over an old ceiling, and sometimes that's absolutely the right call. But in this kitchen, the original ceiling had reached the point where patching would have been a short-term fix at best. Once you start seeing movement in multiple areas, or the surface has deteriorated beyond a certain point, a clean strip-out and fresh start gives a far better result — and it lasts.
In older Epsom properties especially, you often find lath-and-plaster ceilings that are over a hundred years old. They've done their job, but there comes a point where they simply need replacing. Modern plasterboard is more stable, takes a skim finish beautifully, and won't give you the same problems again.
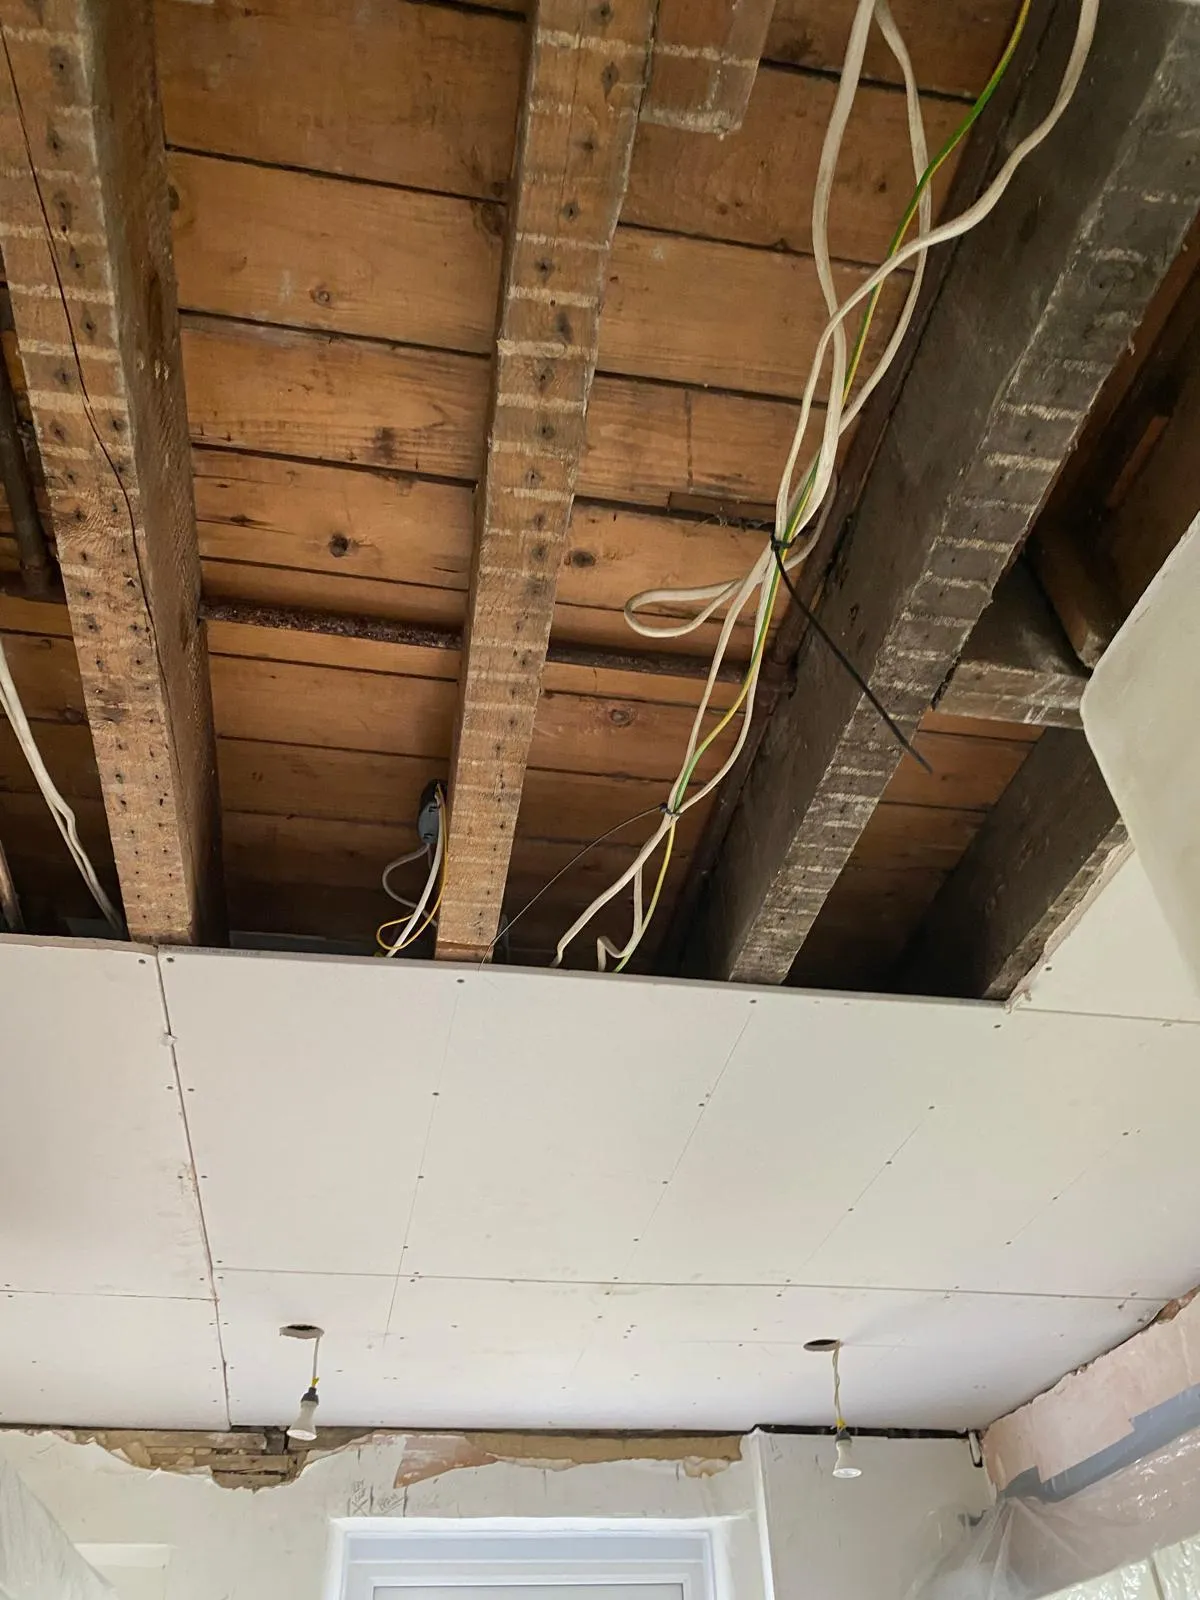
Step 1: Stripping Out the Old Ceiling
The first job is clearing the space properly. Everything in the kitchen gets covered and protected — units, appliances, worktops — and then the old ceiling material comes down. On jobs like this one, that means exposing the joists fully and clearing out all the old debris before anything new goes up.
It's messy work, and doing it carefully matters. You're also working around existing electrics at this stage — light drops, cables running between joists — so everything gets identified and made safe before the boarding begins.
Step 2: Re-Boarding the Ceiling

Once the joists are clear, new plasterboard goes up. On a kitchen ceiling, I use moisture-resistant board — kitchens produce steam and condensation, and standard board simply isn't the right material for the job.
The boards are fixed securely to each joist, cut around the light positions, and all the joints are taped with scrim mesh before any plaster goes on. That mesh tape is what stops the joints from cracking later — skip it and you'll see the joins telegraph through the finish within a year.
Step 3: First Coat of Plaster

The skim goes on in two coats. The first coat is worked across the whole ceiling, pressed firmly into the board and pulled flat. At this stage it looks rough — that's normal. The point of the first coat is to build up an even base and get good adhesion to the board surface.
The light fittings are already positioned at this stage, so the plaster is worked neatly around each one.
Thinking About a Ceiling Job? Here's Where I Work
If your kitchen ceiling — or any ceiling in the house — is giving you cause for concern, I cover Epsom, Stoneleigh, Cheam, and the wider KT17 and KT18 areas. Most ceiling jobs are quicker and less disruptive than people expect.
Step 4: Second Coat and Finishing

The second coat is where the ceiling starts to look like a ceiling. It goes on thinner than the first, and this is the coat that gets worked to a smooth, flat finish. The technique at this stage is different — longer, lighter strokes to pull the surface level and close up any marks from the first coat.
Once it's set and dried fully, you end up with a surface that takes paint cleanly. No texture, no joins showing, no patch marks. Just a flat, even ceiling ready for decoration.
Step 5: The Finished Result
The finished ceiling on this Epsom kitchen came out flat and clean. The downlighters sit flush, the surface is even across the whole span, and the homeowner had a result that looked like it had always been there — which is exactly what a good skim finish should do.
Jobs like this typically involve a bit of coordination — working around existing kitchen units, protecting everything properly, and timing the plastering correctly so each coat has the right set before the next goes on. But the result is worth it.
What About the Boxing Around Pipework?

On this job there was also a small bulkhead — a boxed-out section housing some pipework — that needed to be properly plastered to match the new ceiling. These details matter. A beautiful flat ceiling with a poorly finished bulkhead next to it stands out immediately. Getting those transitions clean is part of doing the job properly.
Frequently Asked Questions
How do I know if my kitchen ceiling needs replacing or just patching? If the damage is isolated to one area and the rest of the ceiling is sound, patching is usually fine. If there's widespread cracking, movement in multiple spots, or a sagging section, a full re-board and skim is usually the better long-term option.
Can a kitchen ceiling be replaced without removing the units? Yes — and that's how most jobs like this are done. Units and appliances are sheeted up and protected, and the work happens above them. It's not always possible to work every corner perfectly without pulling units, but in most cases a full ceiling can be done without disrupting the kitchen layout.
How long does a kitchen ceiling need to dry before painting? A fresh skim coat should be left to dry completely — typically a minimum of 24 hours, though in a kitchen with lower airflow it can take longer. Painting too soon traps moisture and causes issues later. Always mist coat first with watered-down emulsion before applying your topcoats.
Is plastering a kitchen ceiling a messy job? It is a dusty job during the strip-out phase, yes. Once the boarding and skimming starts, it's more controlled. I always sheet everything up thoroughly before starting — units, appliances, floors — so the mess is contained.
Do I need to use special plasterboard in a kitchen? Yes. Moisture-resistant plasterboard (sometimes called MR board or green board) is the correct material for kitchens and bathrooms. Standard plasterboard will absorb moisture over time in those environments.
Can you plaster a ceiling in an occupied house? Absolutely. Most of the ceiling jobs I take on in Epsom and Cheam are in fully occupied homes. With proper sheeting and a tidy approach, it's very manageable.
Based in Epsom and covering Stoneleigh, Cheam, Ashtead, and across KT17 and KT18 — if your kitchen ceiling needs attention, get in touch for a no-obligation quote.
